デスクトップにホルダーを作成します。


templates ホルダーの中身

style.css
/*
Theme Name: MY FSE TEST
Theme URI: https://example.com/my-fse-test
Description: Full site editiong theme
Author: nobita
Author URI: https://example.com/
Version: 1.0
Tags: full-site-editing
License: GNU General Public License v2 or later
License URI: http://www.gnu.org/licenses/gpl-2.0.html
Text Domain: my-fse-test
Tested up to: 6.0
Requires PHP: 5.6
*/
functions.php
<?php

add_action( 'after_setup_theme', 'my_fse_setup' );

function my_fse_setup(){

	add_theme_support( 'wp-block-styles' );
	add_theme_support( 'align-wide' );

	add_editor_style( 'style.css' );
}

add_action( 'wp_enqueue_scripts', 'my_fse_style' );

function my_fse_style(){

	wp_register_style(
			'my-fse-style',
			get_template_directory_uri() . '/style.css',
			array(),
			wp_get_theme()->get( 'Version' )
		);
	wp_enqueue_style( 'my-fse-style' );

}
今回は、theme.jsonは必要ありません。
my-fse-test ホルダを右クリックして、「送る」から、ZIPファイルを作成します。
ワードプレスの管理画面で、外観を選択し、テーマを開きます。
新規追加ボタンをクリックします。

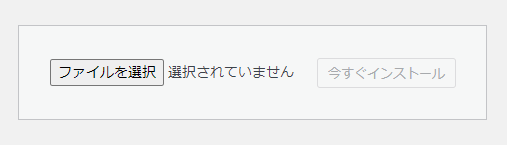
テーマのアップロードをクリックします。

ファイルを選択をクリックして、デスクトップの「my-fse-test.zip」をアップロードします。
アップロードが成功すると、ログインした状態で、以下のような表示になります。
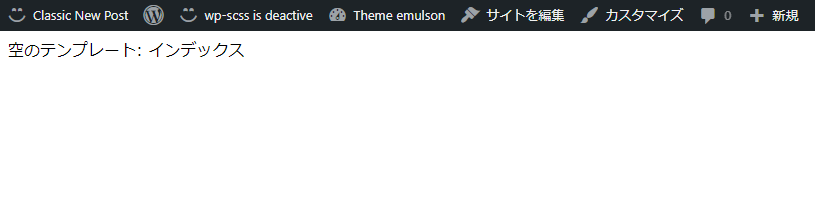
管理パーのサイトを編集をクリックします。
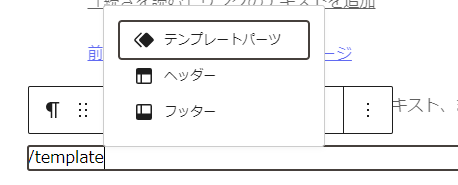
/template と入力すると、3つの項目が表示されるので、ヘッダーを選択します。
選択すると、以下の画面が表示されるので、「選択」をクリックします。
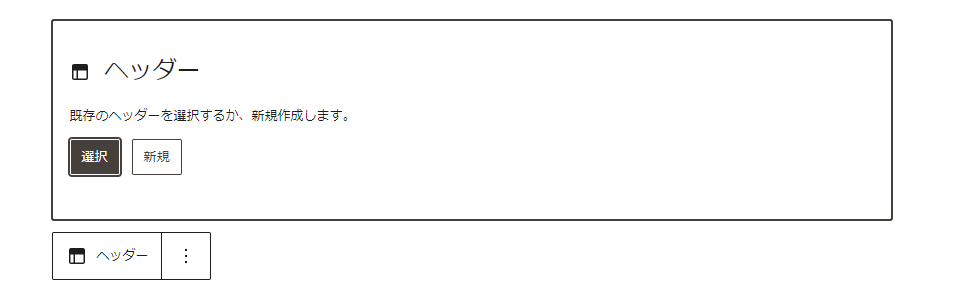
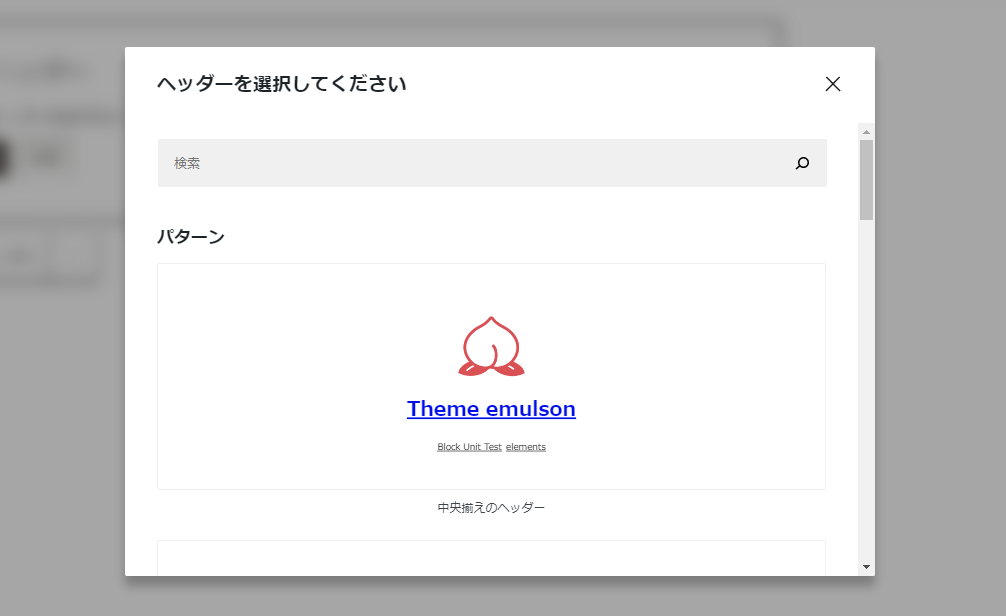
ヘッダーの選択ダイアログが表示されるので、好きなものを選んでください
次に、グループブロックを追加し、/title と入力します。以下のダイアログボックから、「アーカイブタイトル」を選択します。

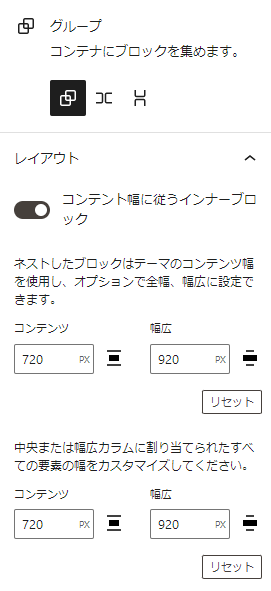
グループブロックを選択した状態で、右サイドバー「レイアウト」に「コンテンツ」720,「幅広」に920を入力します
次に、/query と入力します。
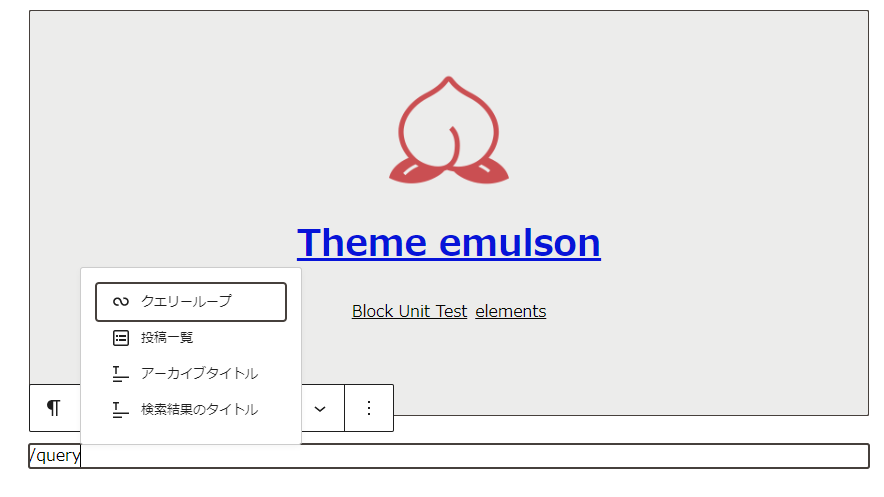
クエリーループを選択します。
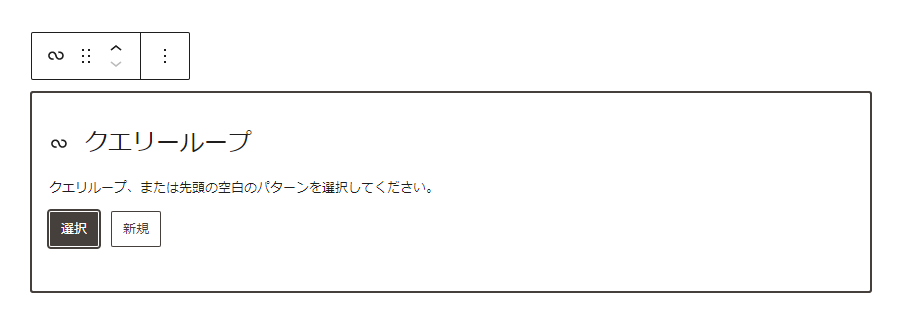
クエリーループでは「新規」を選択します。
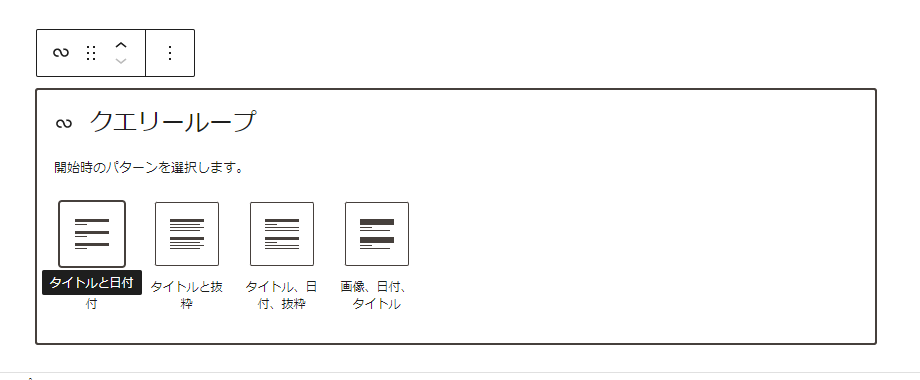
4つの選択肢の中から、「タイトル、日付、抜粋」を選択します。

メニューの、左端の をクリックすると、以下のような表示になります。するリーンショットの右サイドバーを操作します。
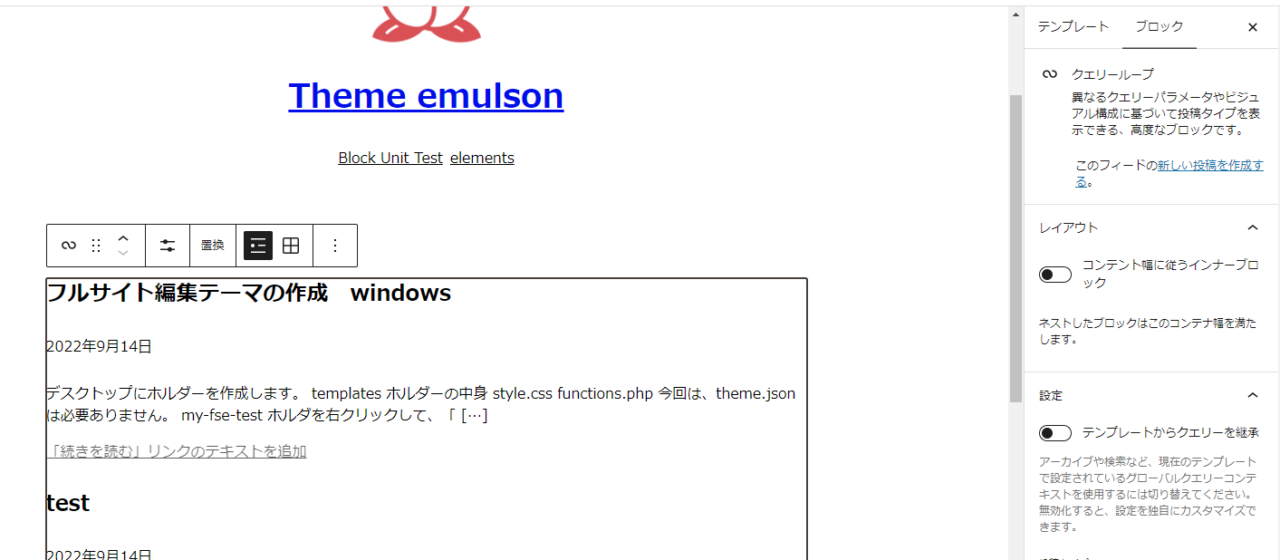
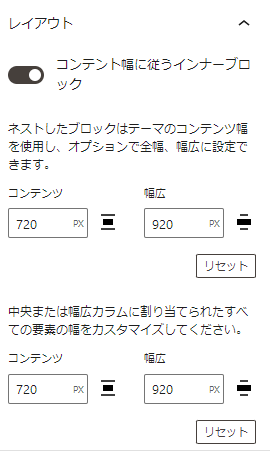
右サイドバーに「レイアウト」を設定します。
「レイアウト」をONに変更すると、テキストフィールドが表示されるので、コンテンツに 720 幅広に920を入力します
次に「設定」をONに変更します。
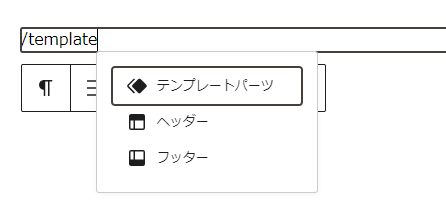
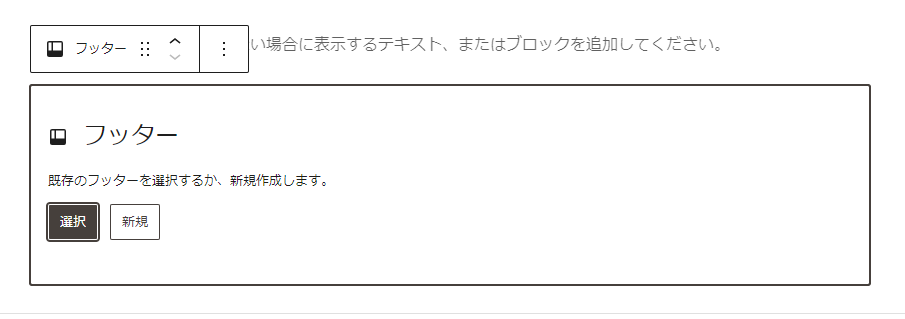
先ほどのヘッダーと同様に、/template と入力します。表示されるダイアログボックスの「フッター」を選択します。
選択すると、ヘッダーの手順と同じように、「選択」をクリックして好きなフッターを追加してください。
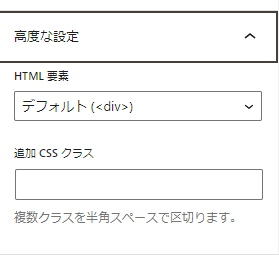
次に、右サイドバーの一番下の項目「高度な設定」をクリックします。
HTML要素の項目を「<main>」に変更してください。
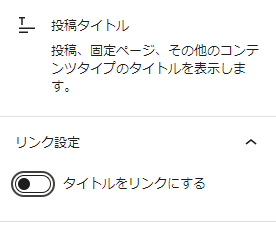
投稿タイトルをクリックして、右サイドバーを表示して、タイトルをリンクするをクリックします。
以上で、index.htmlの編集は終わりです。保存して、ブログを表示してみてください。
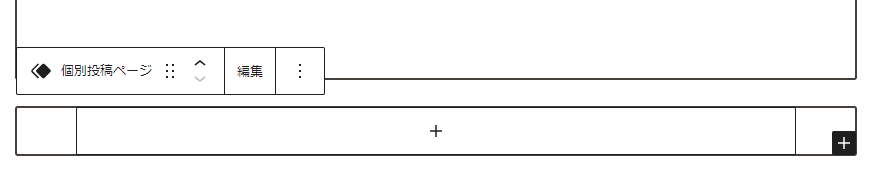
個別投稿ページの設定
個別投稿ページは、index.htmlの設定を行っただけでは、表示されません。
ページ上部の一番左側のアイコンをクリックします。
クリックするとサイドバーが表示されるので、「テンプレート」をクリックします。
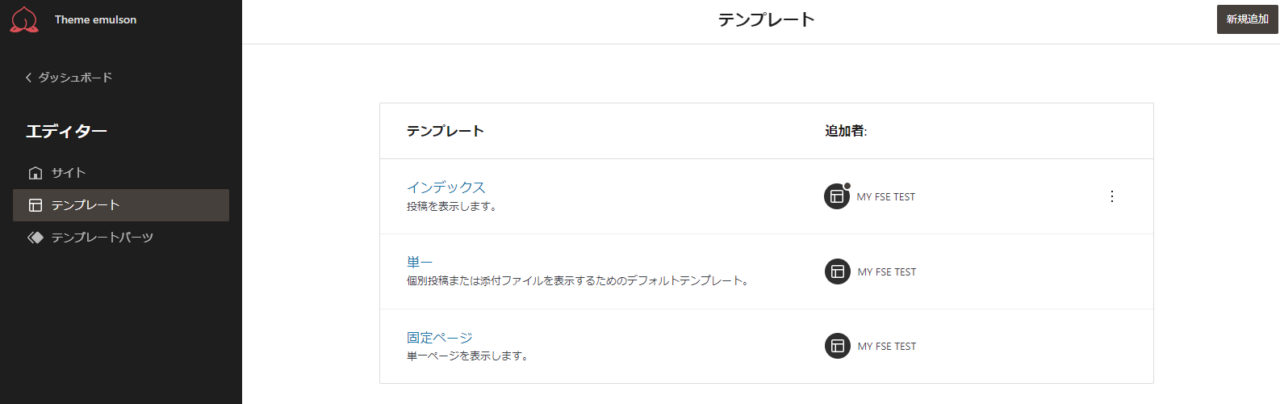
「単一」をクリックして、インデックスと同様に、編集をします。
ヘッダーとフッターの作業は、ホームと同じ作業になりますので割愛します、「クエリーループ」は使用しませんので、どの代わりにどのような作業になるか説明します。
ヘッダーの設定を行ったら、次のように作業します
まず、/template と入力して、「テンプレートパーツ」を選択します。
新規作成をクリックします。
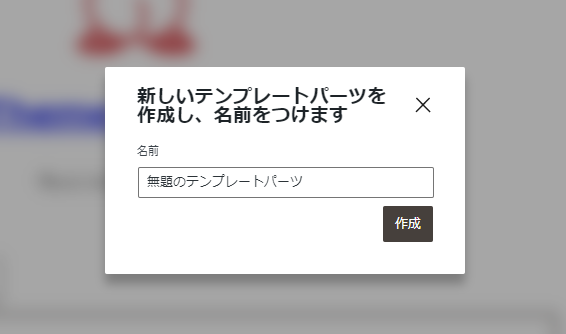
「個別投稿ページ」と入力します
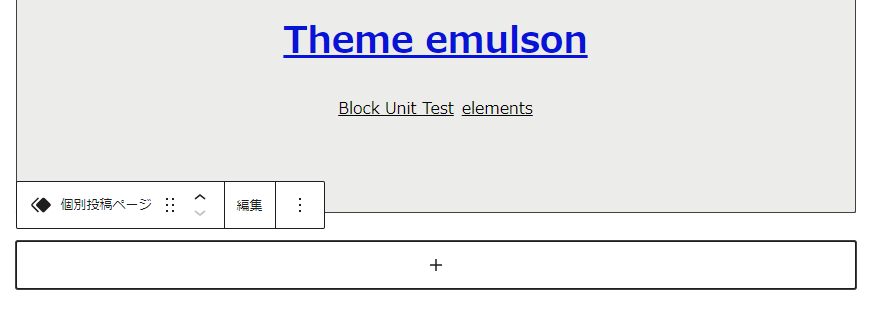
右サイドバーの一番下の「高度な設定」「HTML要素」を<main>に変更します。
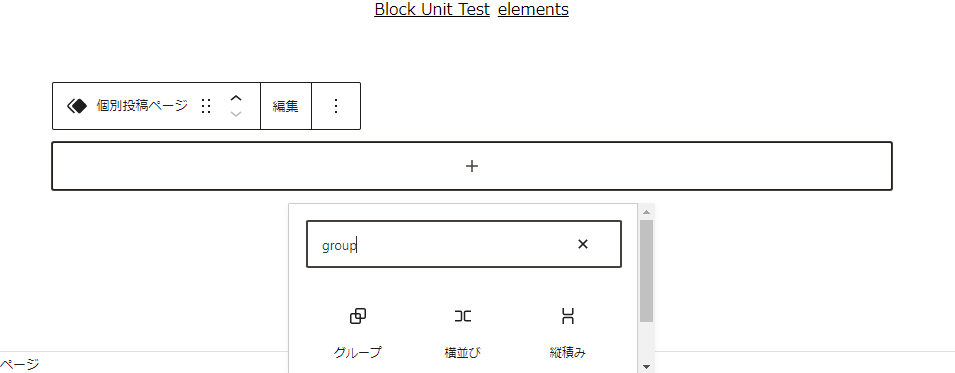
+印をクリックして、ダイアログに、「group」と入力し「ぐるーぷ」を選択しグループブロックを作成します。
グループブロックを作成したら、右サイドバーの「レイアウト」の項目に、コンテンツ 720 幅広に 920を入力してください。
次に、「高度な設定」「HTML要素」を<article>に変更します。
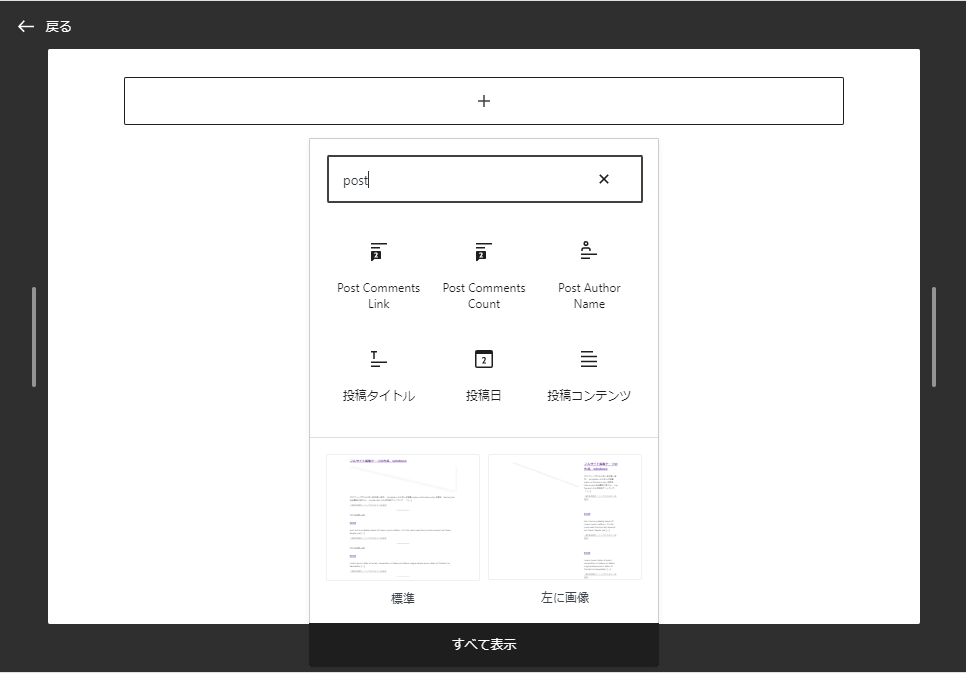
個別投稿ページの「編集」をクリックして「グループブロック」タイトルやコンテンツを追加していきます
ダイアログの検索フィールドに「post」と入力すると、投稿タイトルや、投稿コンテンツ、日付などが選択されるので、必要なブロックを入力します。
一通り必要な項目を入力したら、indexと同様に、フッターを設定したら終了です。